News:February 2010
Filter by :  
Customize your My Page with Goodies!
POSTED ON 26/02/10 00:12

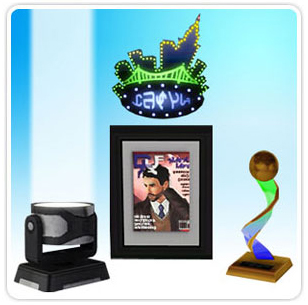
Dress up your My Page by adding stickers, a background to your avatar, and collecting unique badges.

Learn More
Game Update for: 1.10/2.5/3.1
POSTED ON 08/02/10 18:42
To install this update, please start your game and use the “Updates” tab in your Launcher.

This game update includes:

  • Fixes issues with the Input Method Editor for players on the Japanese SKU. Also addresses some functionality errors in the launcher.
  • Fixes a bug that prevents collectible Beetles from showing up in game.
  • Fixes a bug that causes Sims to teleport off of some of the new beds in SP01.
  • Fixes crashes and stalls when multiple patches are being installed.

Before installing an Update for The Sims 3, an Expansion Pack, or a Stuff Pack, it is a good idea to run through the following checklist to ensure your game continues to work smoothly.

If you have any questions about the below steps, please visit the Technical Support forum on the official Sims 3 community found at this URL: http://forum.thesims3.com/jforum/forums/show/10.page

Step 1: Disable Custom Content

Custom Content is all Sims content that did not come from an official The Sims 3 Update, The Sims 3 Store, Expansion Pack, or Stuff Pack. Custom Content is created by 3rd Party Developers that are not regulated by Electronic Arts or The Sims 3 Development Team and may not work with new updates. Custom Content may cause the game to behave unexpectedly or not function entirely.

To disable your custom content, undo whatever you did to install this content to get your game back into an unmodified state. If you placed it in a Sims 3 directory folder, move it to a new folder that is outside your Sims 3 file directory. Your Sims 3 file directory can be found using the paths listed below:

Windows File Directory: C:\Documents and Settings\USER\My Documents\Electronic Arts\The Sims 3

Mac File Directory: User/Documents/Electronic Arts/The Sims/

Once you have installed the official update you may re-enable your custom content. If you experience problems, disable it again until the 3rd party developer updates their content to work with the official Update, Expansion Pack, or Stuff Pack.

Step 2: Back Up your Save Files

It’s always a good precaution to back up your save files before installing an Expansion Pack, Update, or Stuff Pack. To do this, copy the “.sims3” folders found in the Saves folder onto your desktop or another file directory.

Your Sims 3 Saves folder can be found using the paths listed below:

Windows File Directory: C:\Documents and Settings\USER\My Documents\Electronic Arts\The Sims 3\Saves

Mac File Directory: User/Documents/Electronic Arts/The Sims/Saves

After the Update is installed, run the game to verify your saves still function correctly.

Step 3: Let the Update Complete Entirely

Updates can sometimes be rather large and may take a while to download and install completely. Cancelling the update before it has completed may cause unexpected problems, so it is always best to let it finish entirely. Do not close the Launcher until you have confirmed the update is completely installed, as this will cancel the update.

10 Years of The Sims!
POSTED ON 05/02/10 18:39

Thanks for 10 years of loyalty to The Sims! Join the celebration-check out our special 10th Anniversary Set sale at The Sims 3 Store!

Get 10% off all new sets for 10 days! Sale ends February 14th.

Shop the sale

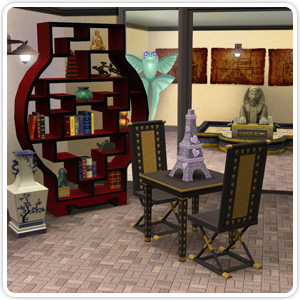
The Sims 3 High-End Loft Stuff now available!
POSTED ON 03/02/10 19:45
Create the ultimate high-end loft lifestyle for your Sims.  The Sims 3 High-End Loft Stuff is now available.

Learn More
Celebrating 10 Years of The Sims!
POSTED ON 03/02/10 18:26

The countdown to our 10th Anniversary has begun! To help you get in the spirit, we’ve put together some special promotions and free stuff over the next couple of days. Be sure to check back daily to see the surprises revealed!

February 1st – 2 FREE 10th Anniversary items!

The Sims Celebrations – In the Dawn of Sims

Has there ever been a Sim that can resist Bella’s charms?  Was the Tragic Clown a misunderstood hero?  These questions have engrossed some of the most brilliant minds of our time.  Will you take part in the debates?

Get Free Gift

February 2nd - 2 FREE 10th Anniversary items!

The Sims Celebrations - The Sims Strike Back

Do you aspire for grilled cheese?  Did Mrs. Crumplebottom haunt your bowling alley?     

Get Free Gift

February 3rd - 2 FREE 10th Anniversary items!

The Sims Celebrations - Let There Be Sims!

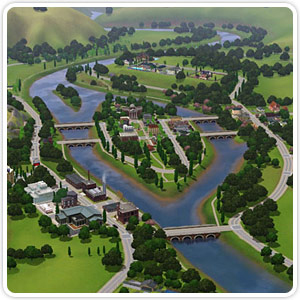
Explore Sunset Valley and much more in The Sims 3.

Get Free Gift


Game Update for: 1.9/2.4
POSTED ON 02/02/10 01:41
To install this update, please start your game and use the “Updates” tab in your Launcher.

This game update includes:

-          High-End Loft Stuff - This update is required to play the digital download version of The Sims 3 High-End Loft Stuff.

-          World Adventures - Users can now capture the Town Theatre subject in photography

-          A change was made so that desks do not burn anymore.

-          Mac only: Fixed an error with uploading screenshots from the Mac when the “.jpg” file extension is deleted.

-          PC only: Fixed a bug where the launcher would display an error message that it could not connect to EADM on Vista and Windows 7 machines.


Before installing an Update for The Sims 3, an Expansion Pack, or a Stuff Pack, it is a good idea to run through the following checklist to ensure your game continues to work smoothly.

If you have any questions about the below steps, please visit the Technical Support forum on the official Sims 3 community found at this URL: http://forum.thesims3.com/jforum/forums/show/10.page

Step 1: Disable Custom Content

Custom Content is all Sims content that did not come from an official The Sims 3 Update, The Sims 3 Store, Expansion Pack, or Stuff Pack. Custom Content is created by 3rd Party Developers that are not regulated by Electronic Arts or The Sims 3 Development Team and may not work with new updates. Custom Content may cause the game to behave unexpectedly or not function entirely.

To disable your custom content, undo whatever you did to install this content to get your game back into an unmodified state. If you placed it in a Sims 3 directory folder, move it to a new folder that is outside your Sims 3 file directory. Your Sims 3 file directory can be found using the paths listed below:

Windows File Directory: C:\Documents and Settings\USER\My Documents\Electronic Arts\The Sims 3

Mac File Directory: User/Documents/Electronic Arts/The Sims/

Once you have installed the official update you may re-enable your custom content. If you experience problems, disable it again until the 3rd party developer updates their content to work with the official Update, Expansion Pack, or Stuff Pack.

Step 2: Back Up your Save Files

It’s always a good precaution to back up your save files before installing an Expansion Pack, Update, or Stuff Pack. To do this, copy the “.sims3” folders found in the Saves folder onto your desktop or another file directory.

Your Sims 3 Saves folder can be found using the paths listed below:

Windows File Directory: C:\Documents and Settings\USER\My Documents\Electronic Arts\The Sims 3\Saves

Mac File Directory: User/Documents/Electronic Arts/The Sims/Saves

After the Update is installed, run the game to verify your saves still function correctly.

Step 3: Let the Update Complete Entirely

Updates can sometimes be rather large and may take a while to download and install completely. Cancelling the update before it has completed may cause unexpected problems, so it is always best to let it finish entirely. Do not close the Launcher until you have confirmed the update is completely installed, as this will cancel the update.